Business cards provide a first and sometimes lasting impression for potential customers and colleagues. There are plenty of websites out there that offer pre-made templates where you just have to jot-in information and press print, but what if you want something more unique? Photoshop is one of many tools that excel with making exactly that; custom business cards. In this groovy tutorial, we’ll take a look at the basics for designing a Business card in Adobe’s Photoshop software.
Step 1
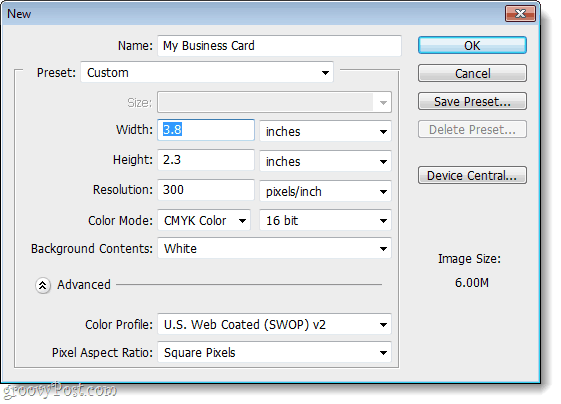
Open up Photoshop and create a new file. What we put into this window is important because it sets you up for printing high-quality cards and ones of the correct size. The standard business card size is 3.5 in (w) x 2 in (h). But we also want to leave room for print bleed, so we’ll add a 0.3 in a white border around the edges. We also want to use CMYK color set at a resolution of 300 pixels per inch so that our prints turn out in high quality. In summary, if you want a standard size business card:
Width = 3.8 inchesHeight = 2.3 inchesResolution = 300Color Mode = CMYK Color, 16 bits.
Step 2
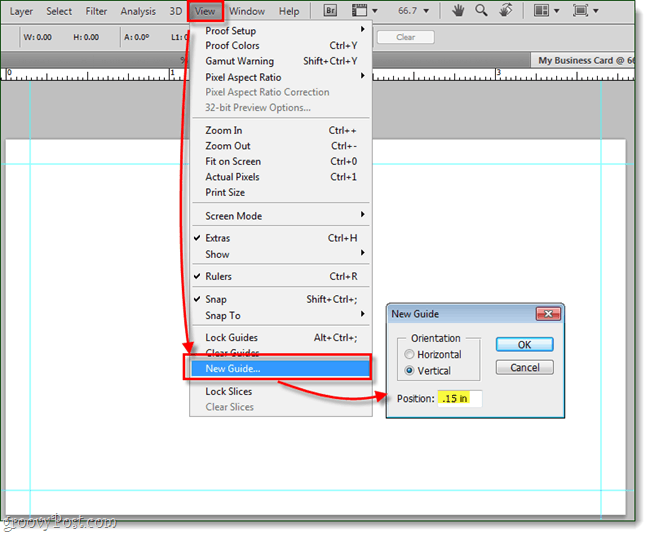
Now we need to set up some guides so that our business card ends up with the right measurements. Since the card itself is 3.5 in x 2 in, and our canvas is 3.8 in x 2.3 in, we need to add a .15 in a border on all sides. To do this we’ll use 4 visual guides. To do this click the View menu and Select New Guide… and then set the position as 0.15 in for the first guide. Repeat this so you have one set for both Horizontal and Vertical. Then, once you have the first two done you’ll need to use some math skills. For the next vertical guide put 3.65 in, and for the next horizontal guide put 2.15 in. This should give you 4 blue guides in equal proportions around your canvas. To summarize this step:
Go to View > New Guide1st guide = Horizontal 0.15 in2nd guide = Vertical 0.15 in3rd guide = Horizontal 3.65 in4th Guide = Vertical 2.15 in
Step 3
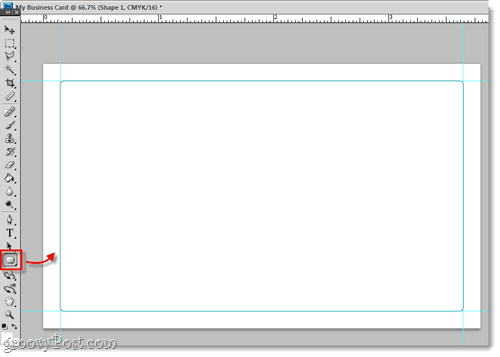
At this point, it is entirely optional, but I like to add a rounded rectangle to the guidelines so I have a visual outline of my card. Next, we’ll add a few more guidelines to help us keep the design of the card clean and centered.
Same as before, we’re going to add some guidelines in that are exactly 0.15 in closer to the center of the canvas that the previous ones. I do this because you’ll want to keep all of the text and graphics of the card within this area. Why? A few reasons: The first is that if the edge of the card becomes damaged you don’t want your potential client to lose vital information. Also, if you later need to get rid of the outside edges you can use these inner guides to prevent bleed problems. Lastly, it just makes your card look more professional. The measurements for these guides will be:
1st guide = Horizontal 0.3 in2nd guide = Vertical 0.3 in3rd guide = Horizontal 3.5 in4th Guide = Vertical 2 in
Step 4
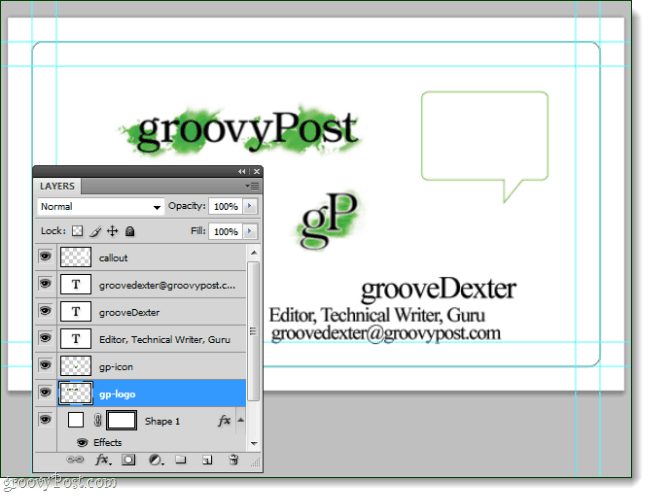
Now that we have our guides set up, we can start designing! This is the fun part, put whatever graphics, slogans, phone numbers, names, titles, addresses – just throw everything you know you’ll want to use anywhere on the card’s canvas. While adding things in, assign their Layers an appropriate name. This will keep your Photoshop file organized and allow you to easily make changes.
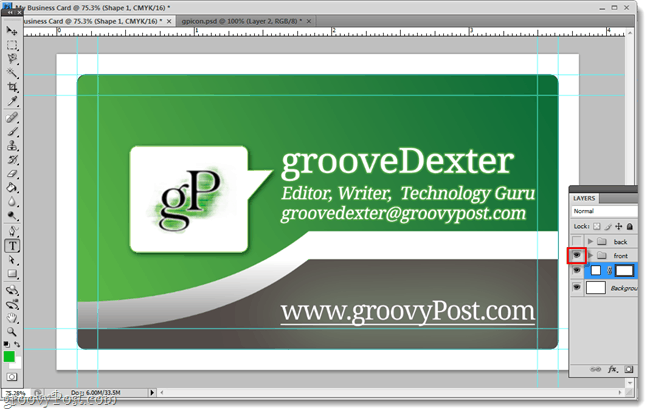
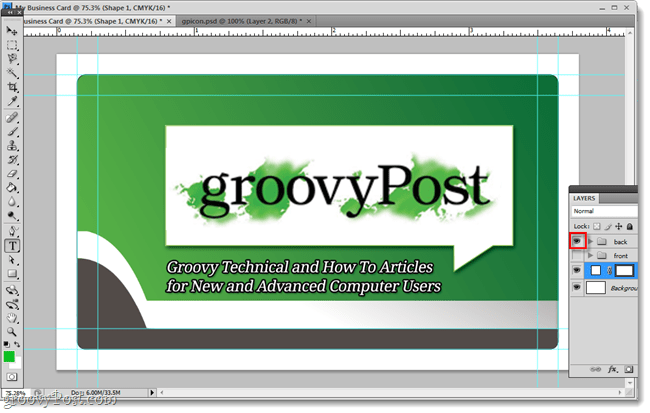
At this point we’ll also go ahead and create two-layer groups (folders), this will let us design both the front and back of the card in one Photoshop file. And now that we have groups set up, if you have something you know you want only on the front, or only on the back –just throw it into one of those folders! Other elements that you’ll use on both sides, can just stay out of the folders entirely.
Step 5
Now the rest is all part of the creative process. You can keep your business card a simple white with your logo and contact information, or you can try to make something a little fancier. Below I spent a few minutes messing around with custom fonts, sizing, positioning, shapes, and gradients. The result? Something groovy! Because earlier we separated the front and back layers, now all I have to do to view both sides is to hide either folder and make the other visible.
Done!
Now your business card is ready for printing. All you need to do at this point is to get ahold of a high-quality printer, or contact your printing company and ask them what format they want your card sent to them as. If you’d like to see how this business card was designed, you can download the PSD file for it here. btw. . . that’s actually a decent looking business card–very easy to read and the right things pop out. Thank you for this tutorial. We are a micro business, and this tutorial is helping us with our marketing budget. Thank you the time you spent in creating this post. We plan to visit you in the future for any other tutorials. When I tried to print double sided card front and back cutting marks are getting different position . Comment Name * Email *
Δ Save my name and email and send me emails as new comments are made to this post.


![]()
