While most times it’s the content in our documents that we must focus on, it’s the appearance we need to check when that part is done. This is especially crucial for professional or educational documents that we share with others. To help you find and fix formatting problems in Word, here’s how to use Designer.
Use Designer in Word on the Web
Visit the Microsoft Word website, sign in, and open the document you want to use. Go to the Home tab and click Designer on the far right of the ribbon.
This opens the Designer sidebar. At the top, you’ll see how many issues were found and below that, suggested themes you can pick from to give your document a consistent look.
About Designer’s Suggestions
You’ll receive various suggestions from Designer depending on the current formatting of your document. So you may see options to adjust a heading, align a paragraph, fix the spacing, or change the font size. If you receive a message when you hit the Designer button, you can still use the tool. It just may not be as beneficial. From Microsoft:
Review Designer’s Suggestions
Click the box in the sidebar displaying the number of issues to review each one. You can then choose to Accept all or Reject all changes immediately if you like. Or you can review each one individually. For example, your document may contain forms or custom designs that Designer can’t read, or the Designer AI can only provide results that are below the expected threshold.
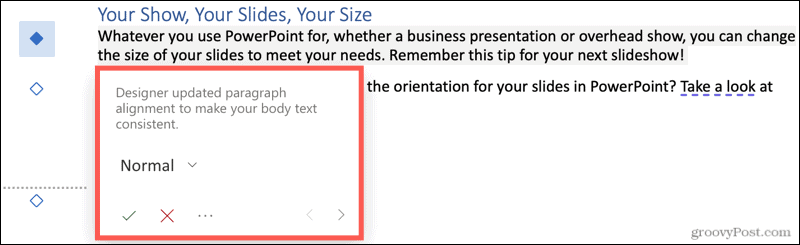
You’ll see all issues found with a diamond indicator on the left side of the document. Plus, each issue will display a small pop-up box near the content with the following options.
Make a change yourself: Click the drop-down box to apply a style other than the suggested one.Accept the suggested change: Click the green checkmark.Reject the suggested change: Click the red X.Show the context: Click the three dots. Here, you can also accept or reject all changes.Move to the next or previous suggestion: Click the right or left arrow.
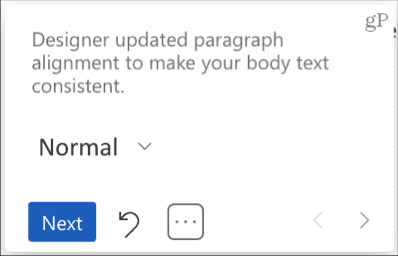
If you accept or reject an individual suggestion, you immediately have an option to undo this change. Click the undo icon that appears in the pop-up. Or click Next to move onto the next suggestion.
When you finish with the final suggestion, click Done in the small pop-up. You’ll then see the number of issues in the sidebar disappear, and your document is ready.
Apply a Designer Theme
If you decide you’d like to use one of the themes in the sidebar, click the one you want your document will update.
You can close the Designer sidebar when you finish or at any time by either clicking the X on the top right or the Designer button in the ribbon to deselect it.
Designer, Ideal for Formatting Your Word Document
Designer is a useful tool for giving your Word document a consistent and professional appearance. Whether you accept all of its suggestions or only a couple, it can help you be aware of how you format future documents as well. For more help with formatting, take a look at how to clear the formatting in Word or how to find and replace formatting in both Word and Excel. Comment Name * Email *
Δ Save my name and email and send me emails as new comments are made to this post.


![]()
