Reclaim Drive Space After Windows 10 1809 Update
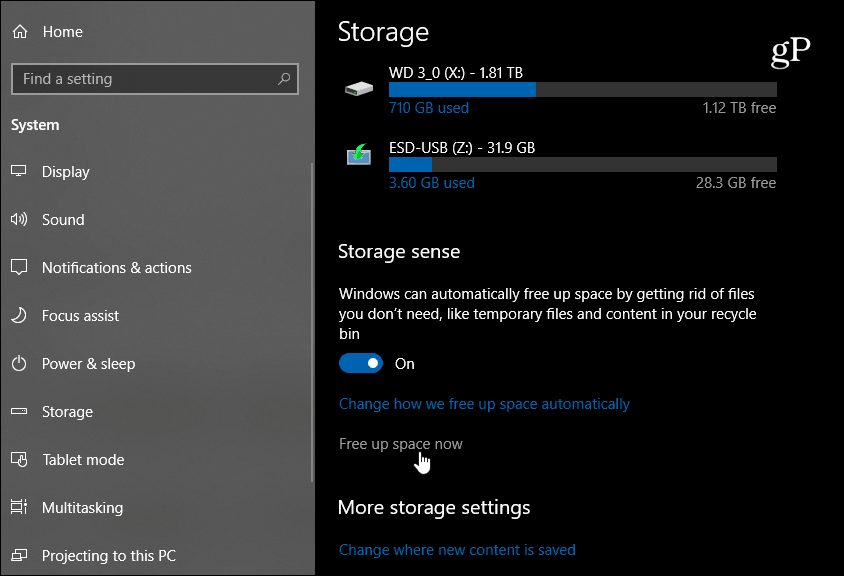
To get started, head to Settings > System > Storage and under the Storage Sense section, click the “Free up space now” link. You may need to scroll down a bit if you have multiple drives connected to your machine.
Windows will scan your drive and you will see a list of files you can remove and the amount of drive space they are using. Here you want to focus on “Previous Windows Installations” (it will be GBs in size) and check it. In fact, while you’re here, you might as well check the other options form the list if you want to clean up more space. After making your selections, go ahead and click the “Remove Files” button.
For now, you can still use the classic Disk Cleanup utility to free up space. However, Microsoft plans to deprecate classic utilities like it and others. Storage Sense is going to take over the job. However, if you do use Disk Cleanup, it’s worth noting that there is a new Downloads option that has been added. It should be unchecked by default, but you should double-check it. If it is checked, all files in the Downloads folder will be deleted and that’s something you might not want to happen.
If you have low-capacity SSD and upgraded to Windows 10 1809, this is an easy way to clear room for your other files. How much space were you able to get back? Comment Name * Email *
Δ Save my name and email and send me emails as new comments are made to this post.


![]()
