Outlook: Enable, Disable, or Empty AutoComplete
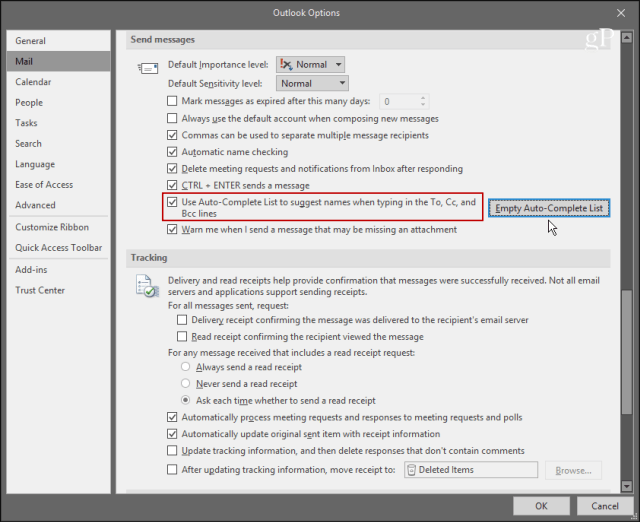
Note: The instructions for this are the same for the newest versions of Outlook, part of the Microsoft 365 (formerly O365) suite of Office apps. To access the AutoComplete setting, head to File > Options and select the Mail tab in the left pane. Then scroll down to the Send Messages section and check or uncheck Use Auto-Complete List to suggest names when typing in the To, Cc, and Ccc lines. Also, note that from here, you can manually clear the entire list by clicking the Empty Auto-Complete List button.
Remove Individual AutoComplete List Entries
Outlook will keep 1,000 entries in the AutoComplete list at a time. Once your cache reaches that limit, Outlook uses an internal algorithm to determine the best names to remove. Essentially it will remove the entries you use the least. However, if you live in Outlook all day and have that many contacts, you might find a situation where some names are unexpectedly removed from the list.
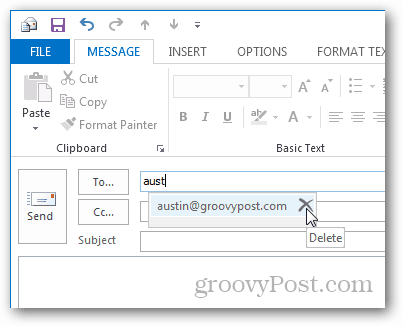
To proactively avoid that situation, Microsoft recommends the best practice is to remove entries that you no longer need. You can do this by removing them one at a time. To do that, launch Outlook and start a new email. Type the first few characters of the entry you want to remove into the To field. When the entry appears in the list of suggested contacts, click the X icon to remove the name or highlight it and hit the Delete key. That’s all there is to it. If you have over 1,000 contacts in your AutoComplete list and notice sometimes important contacts go missing, getting rid of the ones you no longer need will help keep your contacts organized. Comment Name * Email *
Δ Save my name and email and send me emails as new comments are made to this post.


![]()
