You Will Need:
Some HD FootageA video converter Adobe Premiere Pro (CS5 or newer)
Getting Started
The trick here is to convert your footage to a lower quality and resolution which you will use for video editing. Don’t delete your original HD footage, though! After you’re done with the editing you’ll need it. Start by finding yourself a good video converter.
Workflow
Here’s an example workflow I put together so you can get the idea of things before we begin.
Step 1 – Converting the Footage
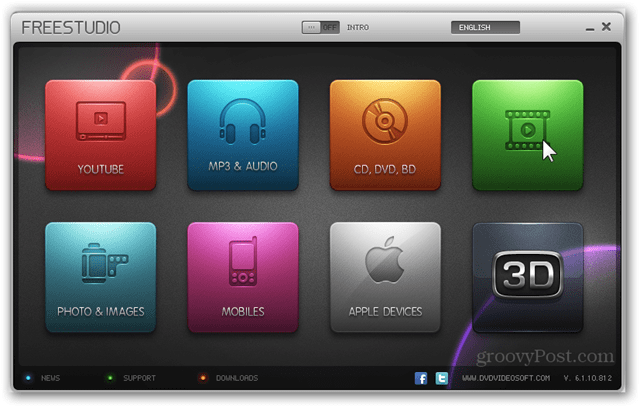
As I mentioned above, I’ll be using FreeStudio to convert my footage before getting to Adobe Premiere.
Start by picking DVD & Video at the top right.
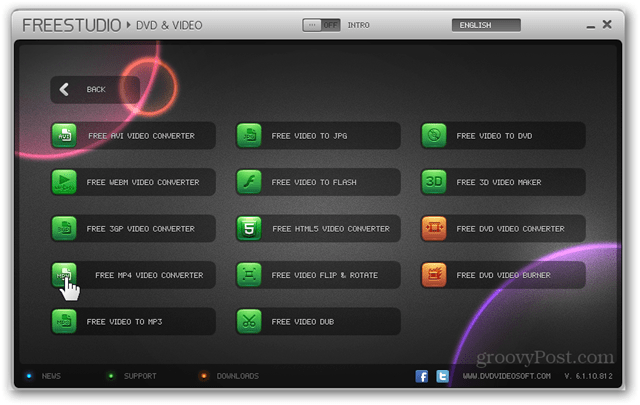
Now I’ll pick the converter I need to use. In my case, I’ve got some MP4 files, which means I need to use the Free MP4 Video Converter. If your files are of a different file format, simply chose the respective converter.
This will open a separate program from where you can begin working on the conversion.
Click Add files to import your videos to the application.
Then tweak your export settings to your liking. I chose a 320 x 180 export resolution (720p divided by 4) with a 0.75 Mbit/s bitrate for the lightest and snappiest video editing possible.
Since 320 x 180 is a rather low resolution which I’m using, as an example, here’s are a few tables with some other resolutions that might come in handy: When you’re happy with all of your settings, press the convert button to begin the conversion. This may take a while depending on the number of videos you have and their specified bitrate.
Now, wait while the video conversion takes place.
You’ll be notified after the conversion is complete. Again, make sure you don’t delete your original HD footage. You will need it before exporting your final video.
Step 2 – Importing and Editing with Adobe Premiere
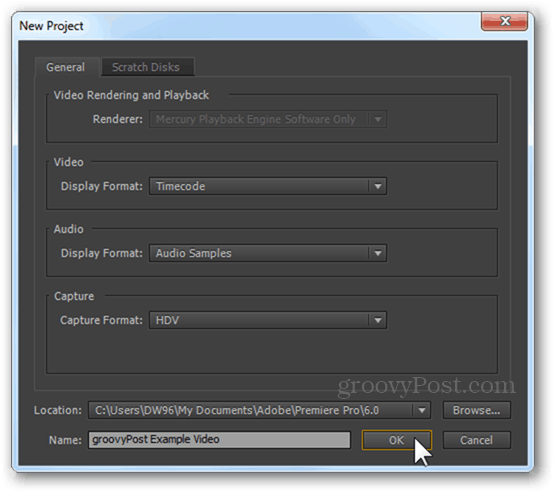
It’s time to get to Premiere. Open up Premiere Pro and create a New Project.
Name it accordingly and tweak other video settings if needed.
Name your sequence and change the following settings for Video in the Settings tab:
Frame Size: 1280 x 720 (your original HD resolution – 720p, 1080p or other)Pixel Aspect Ratio: Square Pixels 1.0
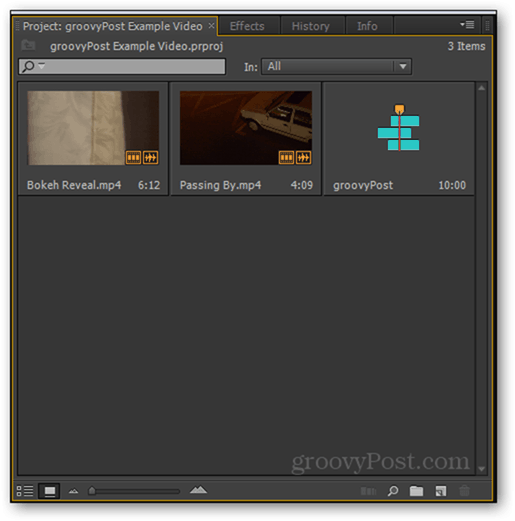
Although I chose an HD resolution for the video, the entire editing process will utilize only the converted SD videos. Go ahead and import them in any way you like – Right Click > Import, or just the classic Drag & Drop method.
You can now begin editing your video just as you would normally – color grading, special effects, transitions and so on. Here’s my example final timeline along with all the changes I made to my clips. Click the image below to view it full size.
Step 3 – Exporting
Now it’s time to export. If you want your video to be in the resolution of the converted SD clips, you can go straight to exporting. However, most of you would like the final video to be in HD, so here’s what you’ve got to do. Start by going to the Project Panel.
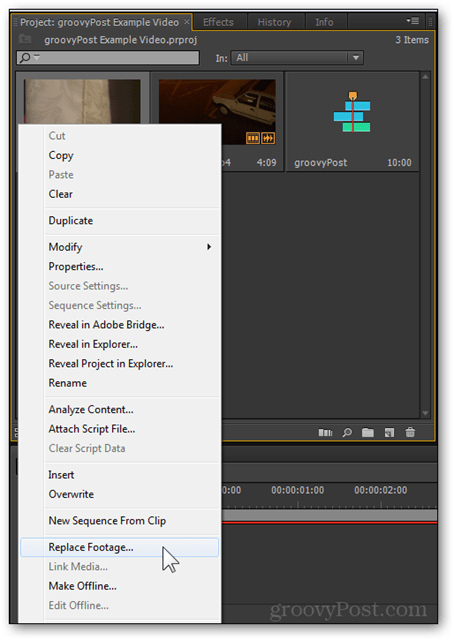
From here, Right Click the first SD clip and pick Replace Footage.
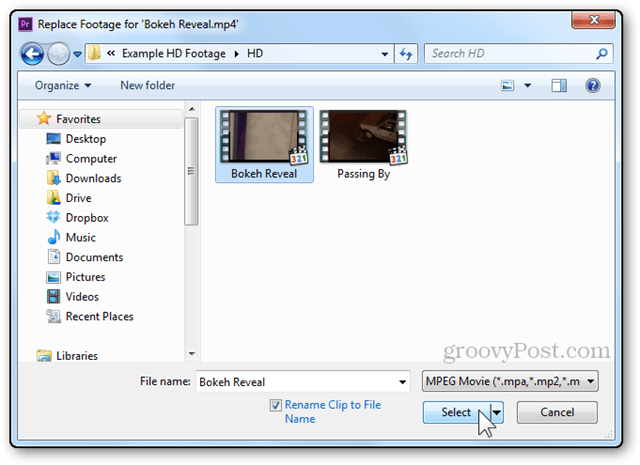
Now navigate to where the original HD footage is stored and select the corresponding clip in HD.
Your SD clip will be replaced with the HD one, with all of your changes — trims, color corrections, effects and others kept untouched.
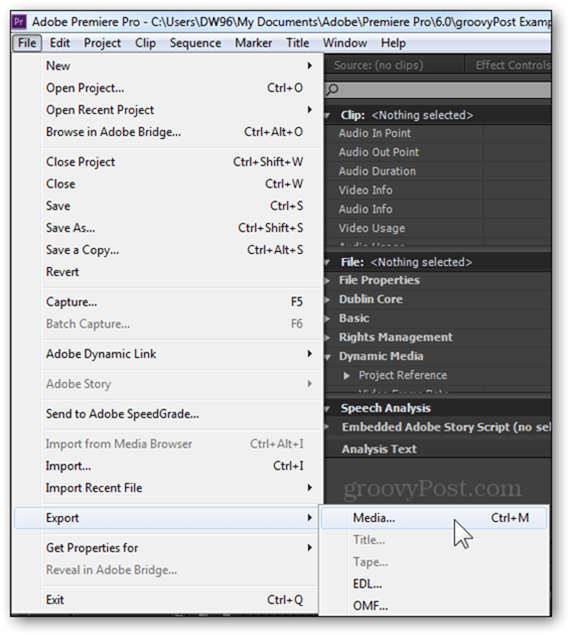
Repeat this process for each individual clip, replacing its SD version with the original HD one. When you’re done, you can go straight to File > Export Media.
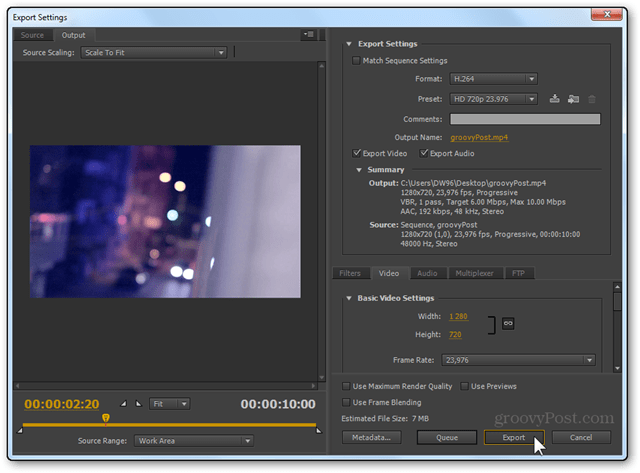
From here, pick a preset that suits you and make sure you chose the right output resolution. In my case, I’ll use H.264 and the HD 720p 23.976.
Hit the Export button and you’re good to go!
Make sure to check out my step-by-step screencast below for more:
Comment Name * Email *
Δ Save my name and email and send me emails as new comments are made to this post.


![]()
