You can see a banner or alert, hear a sound, show a badge icon, view notifications on your lock screen, and more. Plus, you can tailor these notifications for the various apps and services on your Mac. If you haven’t taken the time to customize the notifications on macOS, we’ll walk you through the options. This way, you can receive alerts only for what you want and how you want them.
Open the Notification Settings on Mac
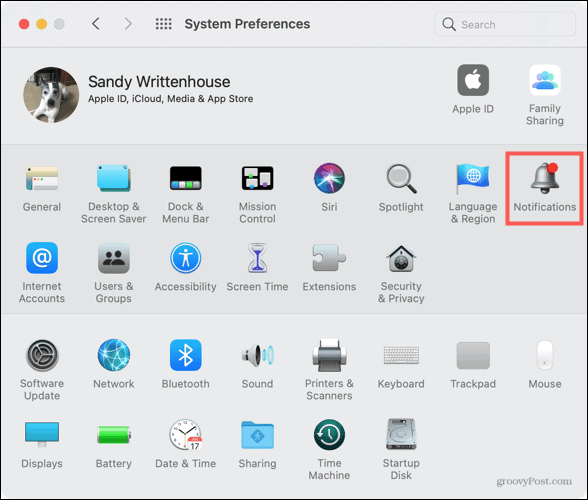
To start configuring your Mac notifications, head to your System Preferences. You can use the icon in your Dock or click the Apple icon > System Preferences from your menu bar. From there, select Notifications.
Enable and Customize Notifications on Mac
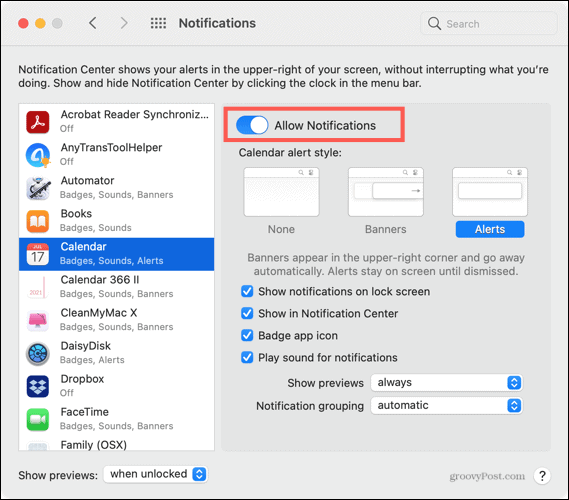
On the left side of the Notifications window, you’ll see the apps and services with notifications available. Select one of the options listed in the menu. On the right, turn on the toggle for Allow Notifications. This toggle also gives you a quick and easy way to turn off notifications for any app or service.
Notification Style
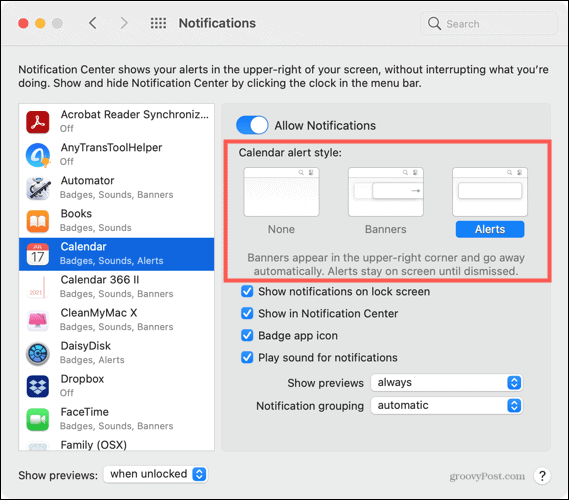
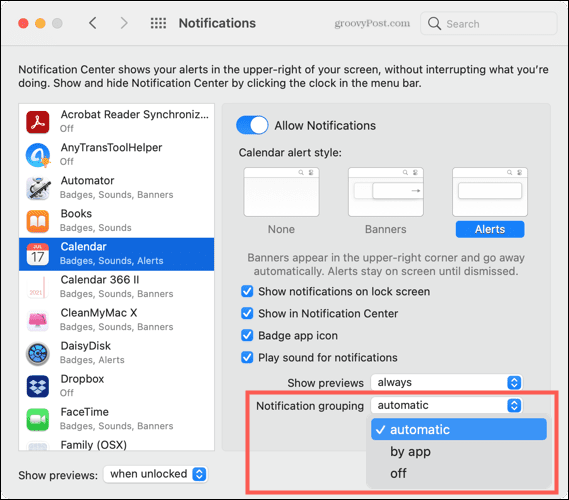
For those you want notifications, start by selecting the desktop alert style in the Calendar alert style section.
A Banner will appear briefly, while an Alert will remain on your screen until you dismiss it. Of course, you can select None if you prefer.
Additional Notification Options
Next, check the boxes for additional notification options below them. You can show notifications on your lock screen and in the Notification Center.
You can also display a badge app icon which is handy for those icons in your Dock. You can also hear a notification sound.
Previews
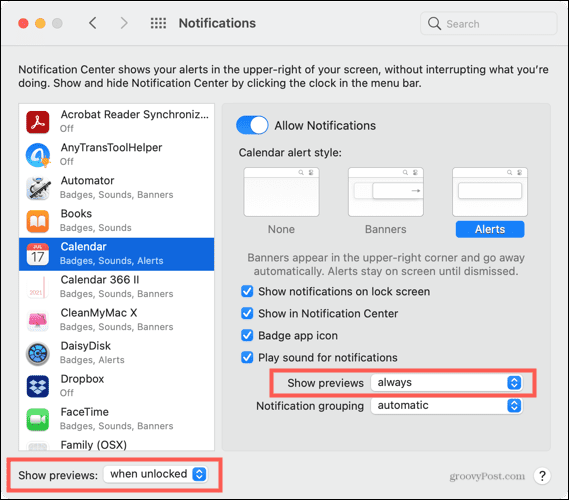
With your notifications active, you can decide if you’d like to see a preview of the notification and how often you’d like to see them. Select Always, Never, or Only When Unlocked from the drop-down menu. You can choose an option that applies per app or service or use the drop-down in the bottom-left to apply the setting more widely.
This is convenient for things like the Mail app, so you can see a preview of the email rather than just a notification that you received an email.
Grouping
Finally, you can group notifications in the Notification Center by app or automatically.
Choosing to group By App means that an app groups notifications with the most recent first. Automatic means that when you receive more than one notification, macOS will automatically group them. You can also select Off to disable notification grouping.
To learn more about the Do Not Disturb service at the top of the Notifications list, check out our article on how to use quiet notifications on your Mac.
Take the Time to Customize
The nice thing about these Mac notification options is that you can mix and match them any way you want. So, you can show a banner and play a sound for your Calendar, view an alert and badge icon for Mail, or see an alert in the Notification Center for Photos. By taking a few moments to customize your notifications on Mac, you can ensure that you receive only those alerts you want. So, for important apps and services, you can be sure you never miss a beat. And for those items you’d instead not be notified about, that’s just as easy. Hit us up on Twitter or Facebook, and let us know what you think about the notification options on Mac! Comment Name * Email *
Δ Save my name and email and send me emails as new comments are made to this post.


![]()
