You’ll see a familiar tool if you own an iPhone or iPad. That’s right, the Control Center on Mac has a similar appearance to the Control Center on your iOS device. It gives you nice rounded corners on the controls and quick ways to adjust your screen brightness, check your Wi-Fi, and play or pause your music. Here, we’ll show you options to customize the Control Center on Mac and how it works.
Accessing the Control Center on Mac
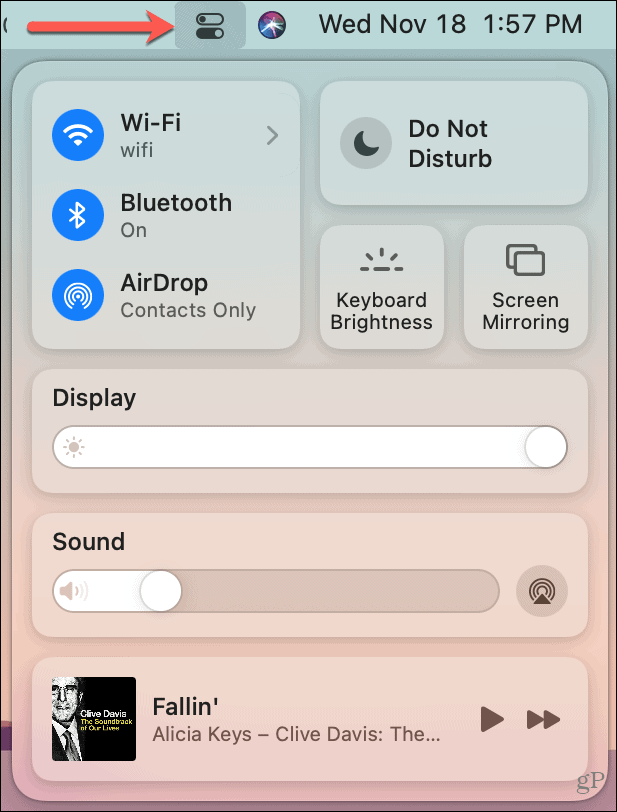
If you’re still getting used to the new look with macOS Big Sur, then you might notice a nifty new icon in the menu bar. What looks like a pair of toggles is the Control Center button you click to access it.
Using the Control Center
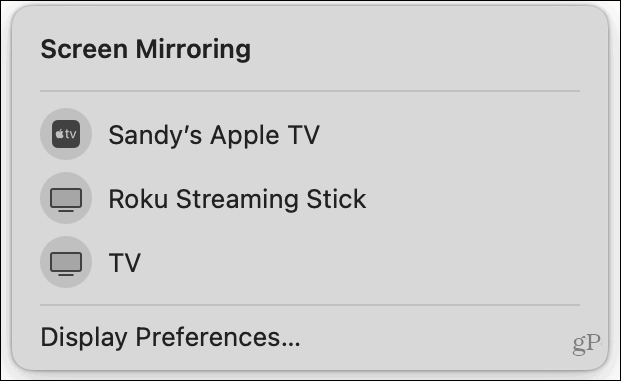
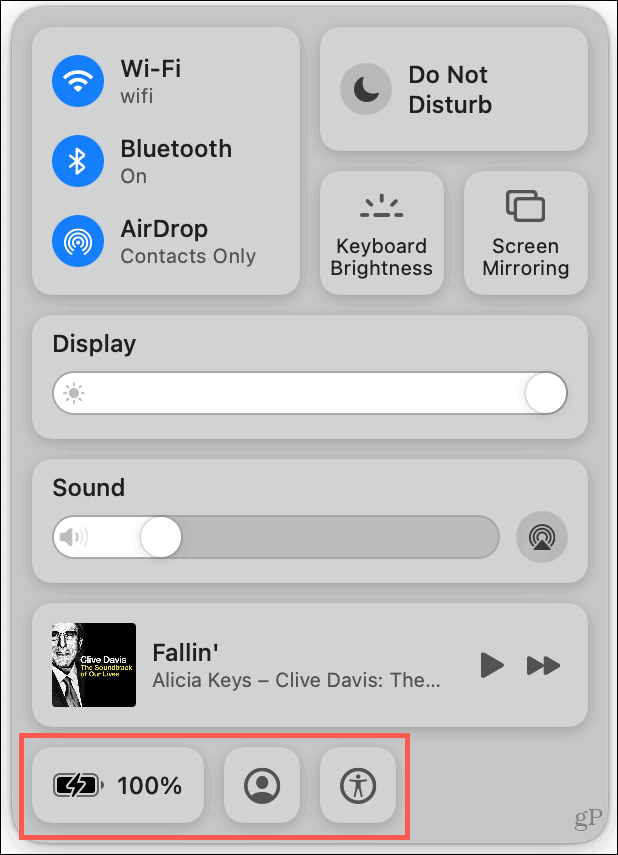
Apple starts you off with nine tools in Control Center that include Wi-Fi, Bluetooth, display brightness, a volume slider, and more. For tools without an action indicator, like an arrow or slider, just click to make changes. This includes Keyboard Brightness and Screen Mirroring.
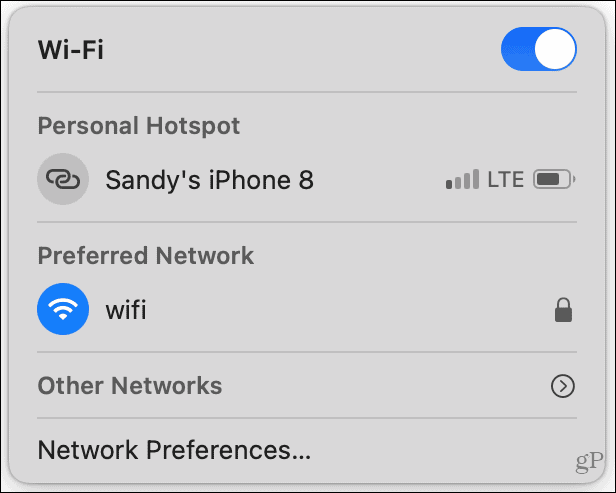
For tools with an arrow, click that for details or click the icon to turn it off and on. This includes Wi-Fi, Bluetooth, AirDrop, and Do Not Disturb.
For tools with a slider, use the slider for a quick adjustment or click the arrow next to the name for more actions. This includes Display (brightness) and Sounds (volume).
For Now Playing, click the icon to open the Music app and select an item to play. Then use the pause or forward button for quick control. To use rewind or a scrub tool, click the icon itself and a mini control window will appear.
If you select a tool in the Control Center that opens a smaller window like those shown above, just click the Control Center icon in the menu bar to close it when you finish and return to the Control Center. Alternatively, click away from the window to close it along with your Control Center.
Customizing the Control Center
Although you cannot remove any of the nine default tools in the Control Center, you currently have the option to add three more. And of those that must stay in Control Center, you can also add them to your menu bar. Open the System Preferences on your Mac using the button in your Dock or Apple icon > System Preferences in the menu bar. Then, pick Dock & Menu Bar. On the left, you’ll see a section right near the top for Control Center. That list contains the tools described above. Even though you can’t remove them from the Control Center, you can add them to the menu bar as well. This is handy for those you use constantly. Select one and check the box for Show in Menu Bar.
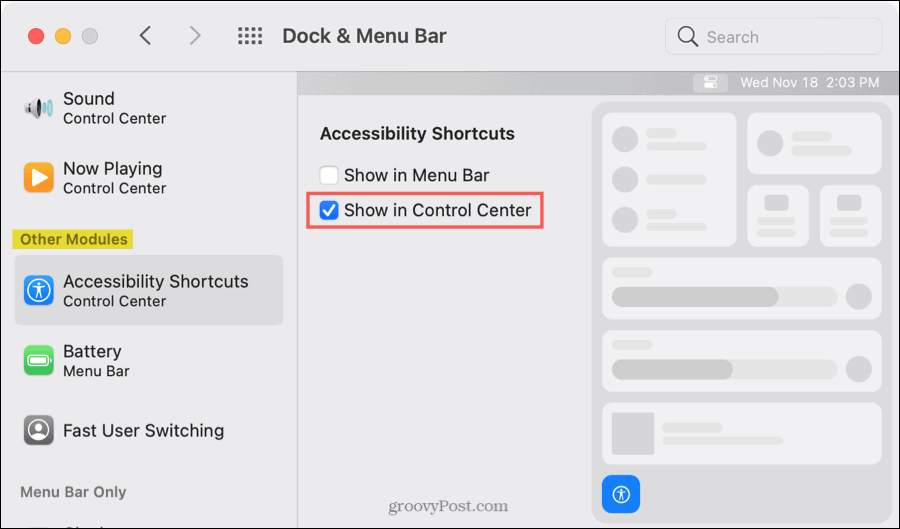
Time-Saving Tip: If you have the Control Center open, you can drag one of the tools directly to your menu bar. The other three tools you can add to the Control Center are Accessibility Shortcut, Battery, and Fast User Switching. To add one of these tools, select it in the Other Modules section of the sidebar and check the box for Show in Control Center.
Any of these tools that you add will appear at the bottom of the Control Center. Click one to interact with the feature.
More Control on Your Mac
Like any other new feature, the Control Center on macOS Big Sur takes some getting used to. But it’s a great way to declutter your menu bar while still having frequently-used controls a click away. Be sure to check out our list of the macOS Big Sur features to try first for more like this.


![]()
