To help you use the screen recording feature in Microsoft PowerPoint, we’ll walk you through the process. Plus, we’ll show you how to embed the recording in your slideshow or save it as a separate file to use elsewhere.
Record Your Screen in PowerPoint
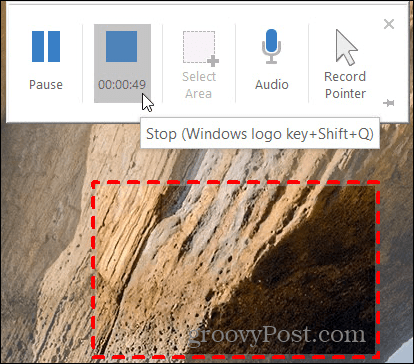
Open an existing PowerPoint slideshow or create a new one. Then go to the slide where you want to add the screen recording and follow these steps.
Immediately after clicking the Stop button, your recording will pop onto the slide you selected in PowerPoint. You can click the Play button on the recording to watch what you captured, move forward or back, mute, or adjust the volume if you recorded audio.
To make sure you don’t lose the recording you carefully captured, you should save your presentation. Click File > Save or Save As, as you normally would, to save your slideshow.
Edit Your Screen Recording
After your recording appears on your slide, you’ll also be redirected to a Video Format tab where you can edit your recording. You have plenty of ways to customize and adjust your screen recording.
Starting on the left of the ribbon, you have these options: Adjust: Make brightness or contrast corrections, add a color filter, use a frame, or reset formatting adjustments you make. Video Styles: Use a style, make the recording a shape, add a color border, or apply an effect like shadow or bevel. Accessibility: Click the Alt Text button to include alternative text for your recording that describes the object. Arrange: Bring the recording forward or send it back if you have other objects on the slide. Or, use the alignment, group, and rotate features. Size: Crop or adjust the height and width of the recording.
Control the Playback for Your Recording
After you finish making adjustments to your screen recording, you can click the next tab for Playback. Here you can trim the video, choose the volume level, and pick how to play the recording.
Bookmark: Add or remove a bookmark for the current time in the recording. Editing: Trim your video or add fade in and fade out effects with the duration for each. Video Options: Select a volume level, choose when to play the recording (in click sequence, automatically, or when clicked on), play it in full screen, loop the video, or rewind it after playing. Insert Captions: Insert WebVTT closed captions that you have saved on your computer.
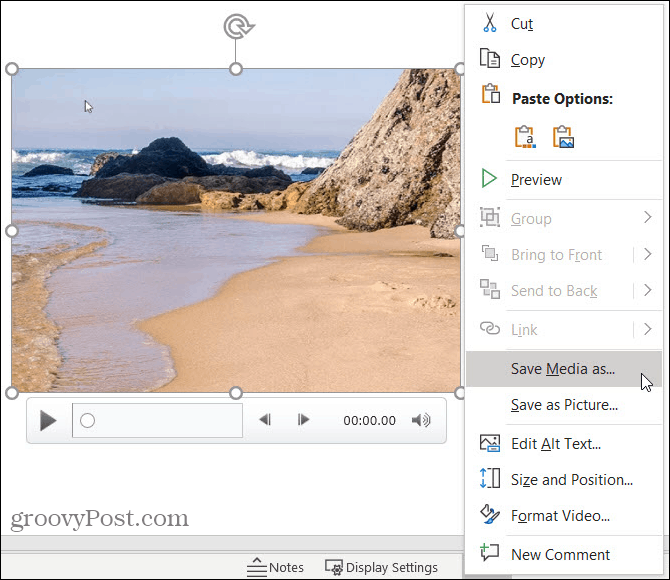
Save the Recording as a Separate File
If you would like to save your PowerPoint screen-recording as a separate file, you can do this easily. It’s handy if you plan to use it on your website or blog without it being in the slideshow.
PowerPoint Screen Recording Tips
Recording what you want on your screen is only part of it. With some of the features above, you can spruce up your recording and remove excess footage. Take advantage of the Video Styles on the Video Format tab. A style can transform a flat video to something that pops off the slide. With your recording selected, simply mouse over each of the styles and you’ll see a preview that helps you get just the right appearance. Then, click to pick the one you like.
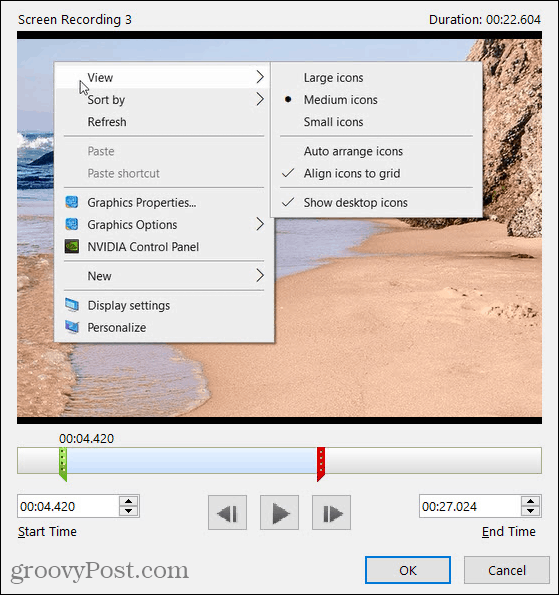
Remove extra video that you captured with the Trim Video feature on the Playback tab. Maybe you took longer to show an action, hit an incorrect button, or had an alert display. You can use the handles in the trimmer to keep only the part of your recording that you want.
And just like using a screen recording to enhance your slideshow, you can insert a video in PowerPoint from your computer or YouTube too!
Make a PowerPoint Screen Recording in Minutes
Depending on what you want to capture, PowerPoint lets you create a screen recording quickly and easily. So whether you use the feature to include in your presentation or for another purpose, it’s a tool worth checking out! If you’re looking for something more than text but less than a video, take a look at how to add a GIF to PowerPoint.


![]()
