You can easily create a self-grading quiz or one you grade manually with Google Forms. Plus, you can make your answer keys, provide point values and feedback to individual responses, and choose when to share the results of the quiz with participants.
Create a Quiz in Google Forms
Sign in to your Google account on Google Forms. At the top under Start a new form, click Blank Quiz. If you don’t see this option, click the arrows next to Template gallery, scroll down to Education, and click Blank Quiz.
Time-Saving Tip: You can also use a template like Assessment or Course Evaluation if it fits your purpose. This will give you a nice jumpstart. Give your quiz a name on the top left, title at the top of the quiz, and optionally a description. Then add your first question and be sure to check out our tutorial on creating a basic form in Google Forms for complete descriptions of the question types.
Decide What to Show Respondents
If you want to grade the quiz manually, there is a setting you’ll need to mark. And with a self-grading quiz, you can allow respondents to see correct answers, point values, and automatic feedback. So before you move on with creating your quiz, decide what to show respondents.
Add Answer Keys
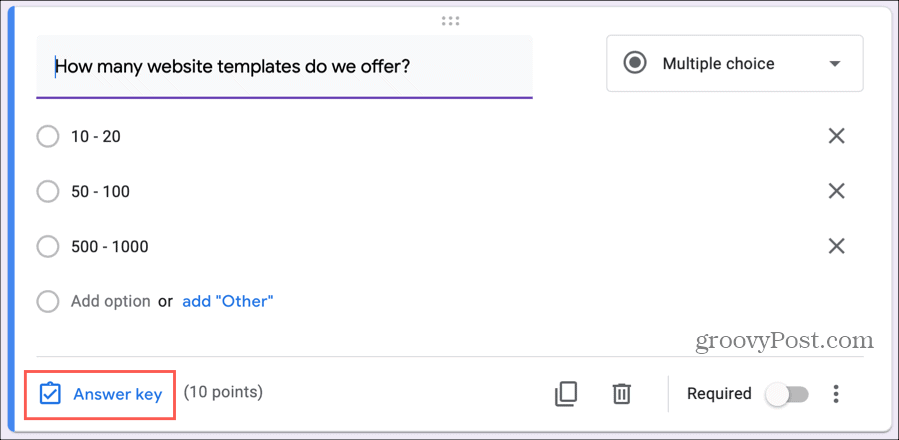
You must include Answer Keys for self-grading quizzes. However, you can add them for quizzes you grade manually to speed up your grading process if you like. After you enter the details for the question, click Answer key on the bottom left. This is where you will enter the correct answer(s) to the question and optionally assign a point value and include feedback.
You can add Answer Keys with answers to the question types listed below. But, you can assign points and provide feedback on any question type.
Short AnswerMultiple ChoiceCheckboxesDropdownMultiple Choice GridCheckbox Grid
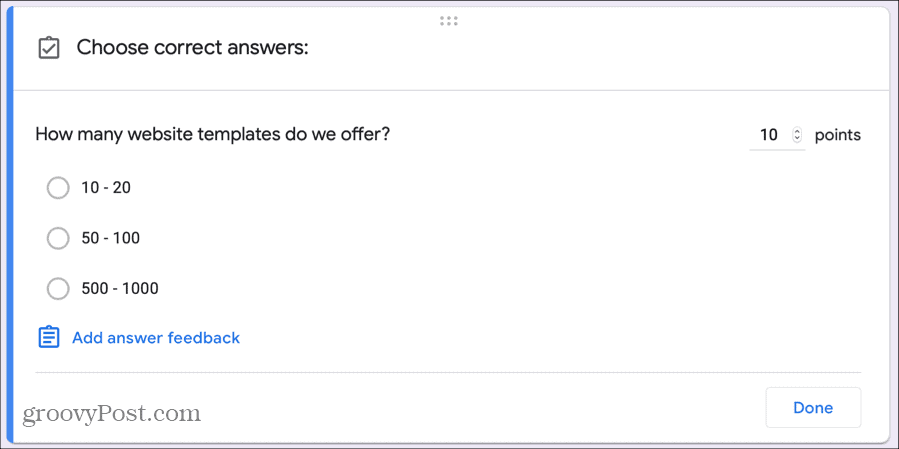
Answers: Mark the correct answer(s) to the question. This is the most important part of the answer key. So, be sure that if more than one answer is correct, as in Checkbox questions, that you mark them all. Points: Use the arrows next to points to assign values if you like. You can also type in an exact point value.
When you complete the Answer Key, click Done.
Include Automatic Feedback
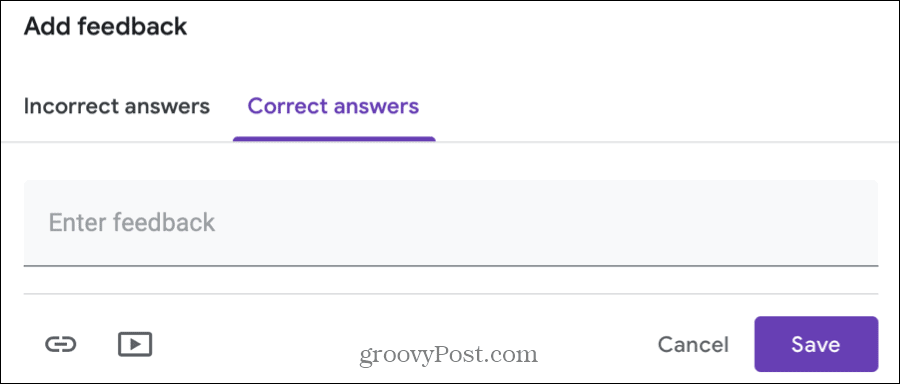
If you create a self-grading quiz, then including automatic feedback is a terrific tool. This lets you explain wrong answers or provide references for correct ones. Respondents can see this after they submit the quiz by clicking View Score. Click Answer key on the bottom left of the question and then click Add answer feedback. Choose if you want to give feedback based on your respondents’ Incorrect and/or Correct answers.
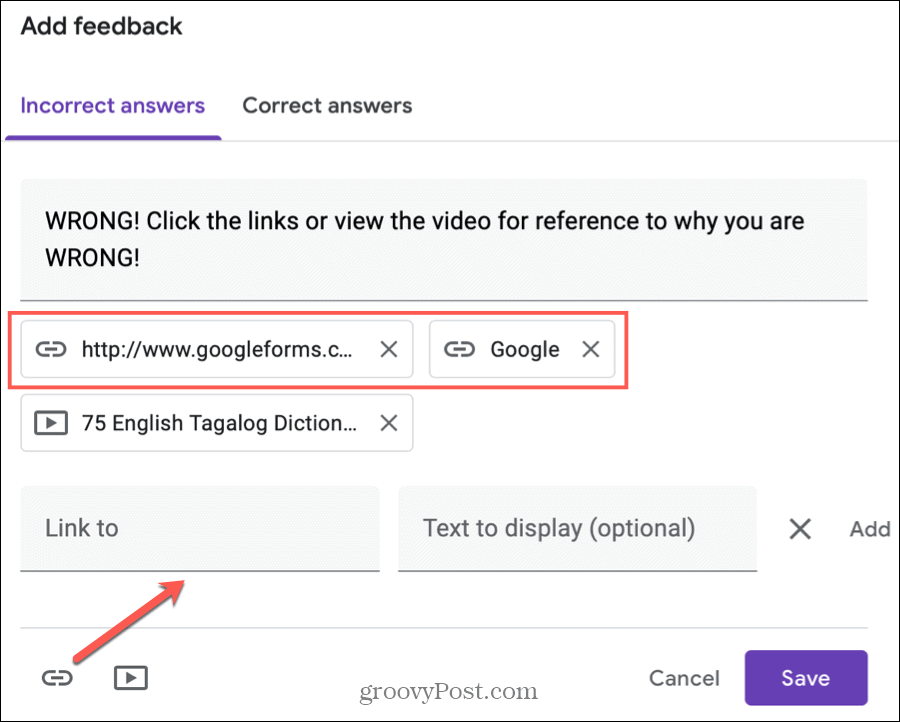
Written Feedback: You can provide written feedback by entering your text in the box. Links: Along with written feedback, you include links which make great references. Click the Link icon, enter the URL in Link to, optionally include text for the link, and click Add. To add more than one link, follow the same steps.
Videos: You can also insert YouTube videos as feedback for answers. Click the YouTube icon, use either the Video search or URL tab to include the video, and hit the Select button to add it. Follow the same steps to add more videos.
When you finish adding feedback, click Save. You’ll then see any feedback you include within the Answer Key. You can click the pencil icon to edit feedback or the trash can icon to delete it.
Grade Your Quiz Manually
If you decide to grade your quiz manually and select this option in the Settings, the only requirement is that you must collect email addresses from the respondents. The email question will pop right onto your quiz automatically when you mark the Later, after manual review option in the Settings.
To grade your quiz, go to the quiz in Google Forms and click the Responses tab at the top. You can then grade question-by-question or individual responses.
Grade Question-by-Question
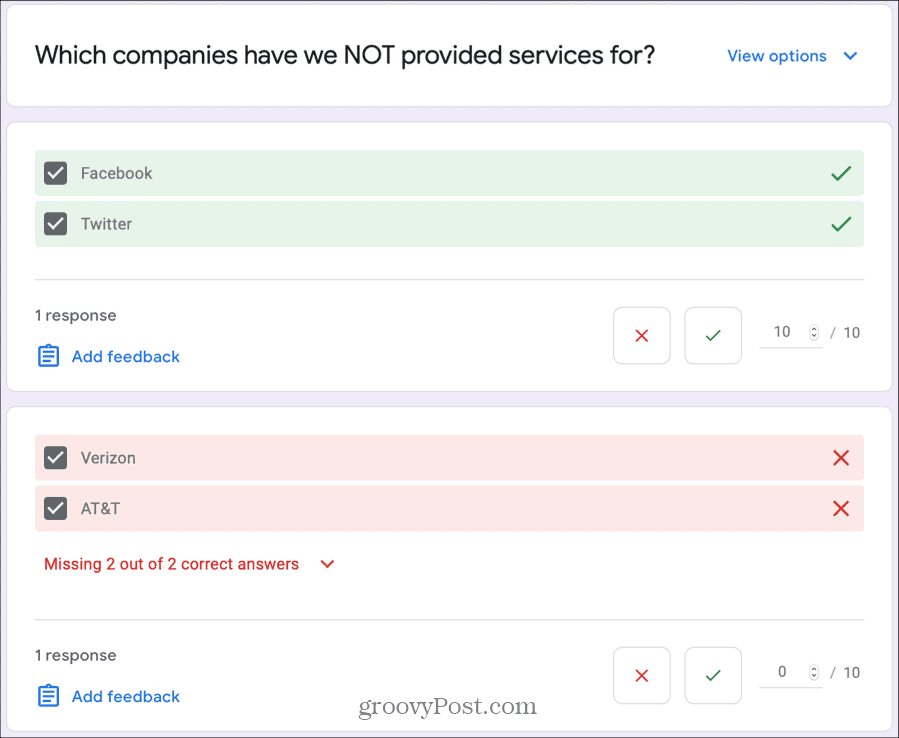
Maybe you have questions that you want to review at the same time for all participants. Select the Question tab at the top and choose the first question you want to grade in the drop-down box. You’ll see the question name and can click View options to see the answer options you provided. Each answer to that question is listed for you. If you add Answer Keys, you’ll see correct answers in green with a checkmark and incorrect questions in red with an X. If you don’t add Answer Keys or if you want to change an answer given, you can use the red X and green checkmark below each question to grade it. And you can click Add feedback to provide written feedback, links, or YouTube videos. (Just like the automatic feedback options described earlier.)
When you finish grading each question, click Save at the bottom.
Grade Individual Responses
If you would like to grade each quiz as it was submitted, click the Individual tab at the top. You will then see the quiz as it was completed by each respondent. What’s different about grading this way rather than question-by-question is that you cannot grade each question as correct or incorrect. However, you can assign a point value and provide feedback.
When you finish grading individual responses, click Save at the bottom.
See and Share Quiz Scores
If you create a self-grading quiz, respondents can see their grades immediately after submitting it. They simply click the View Score button. And you can see a wonderful summary of Google Forms responses yourself. Click the Responses tab on your quiz and then choose the Summary tab. Like with other forms, you can see answers to questions in list, graph, and chart form depending on the question type.
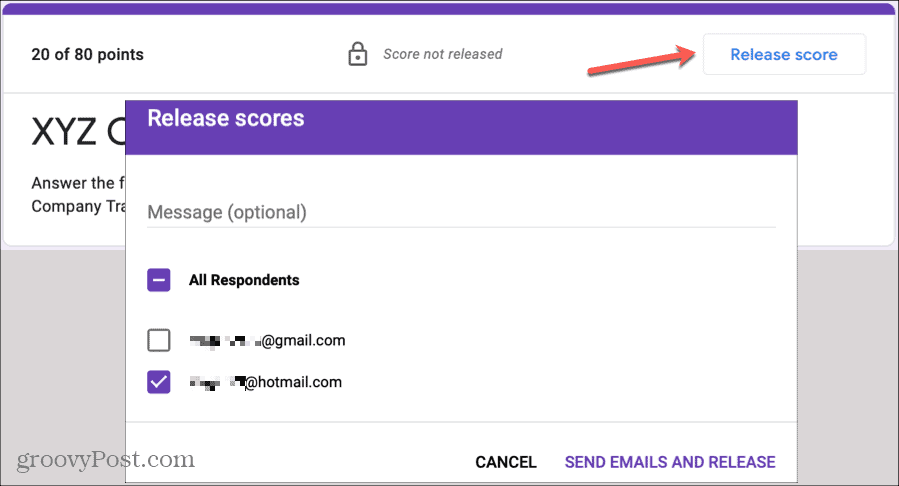
If you create a quiz that you grade manually, you can see answers on the Summary tab and also email the results to respondents.
Creating a Quiz is Simple in Google Forms
If you use Google Forms to create a quiz, you have the flexibility for both self-grading quizzes and those you grade yourself. So keep this convenient tool in mind if you decide to make a quiz of your own!
![]()


