Change Your Account Name on Windows 11 from Settings
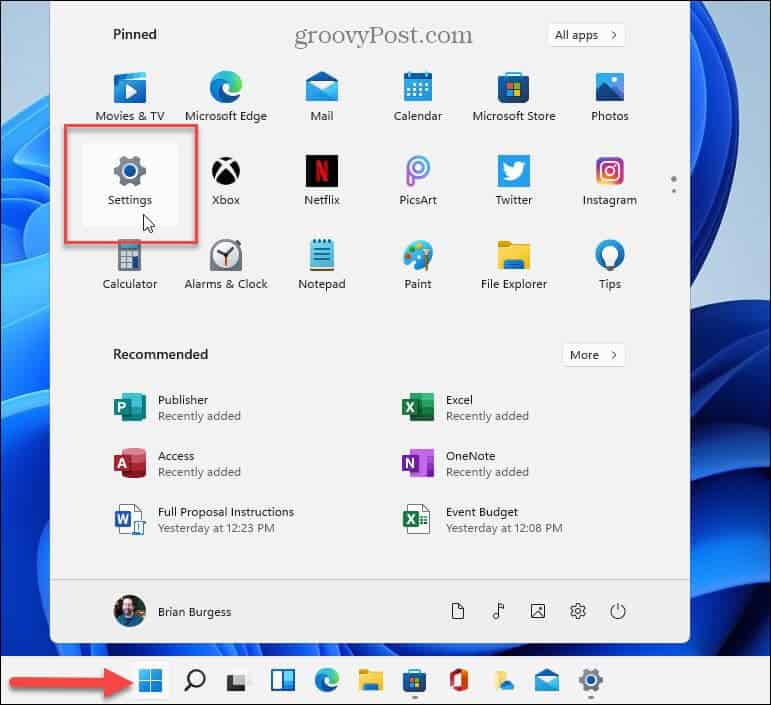
To use the Settings app, click Start > Settings, or alternately, use the keyboard shortcut Windows key + I to open Settings directly.
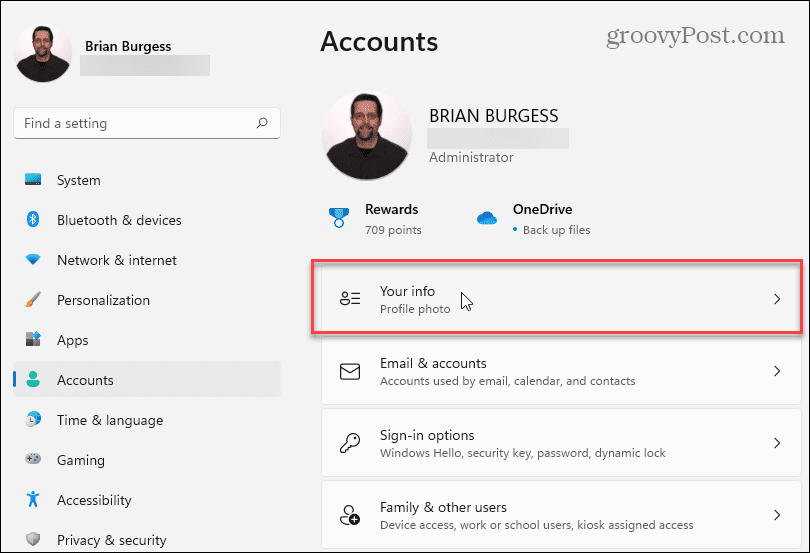
Once Settings opens, click on Accounts from the left column and click Your Info from the list on the right.
On the following screen, click on the Accounts button.
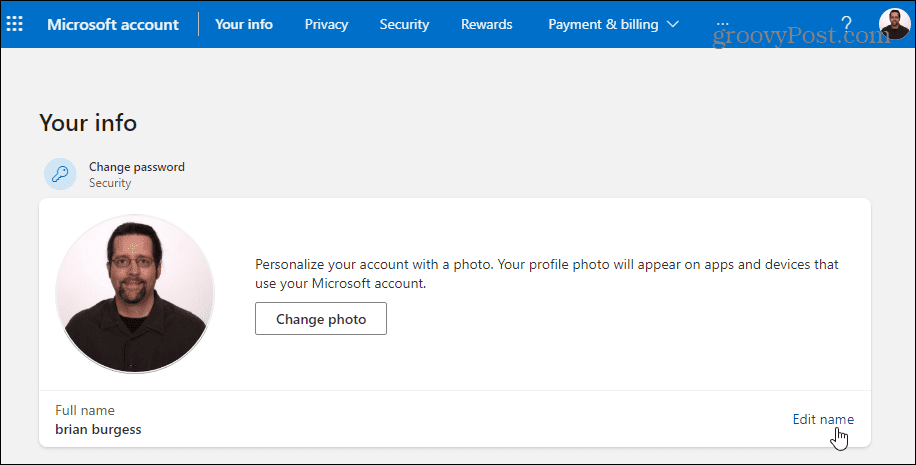
That will open to your Microsoft Account page. Sign in if prompted and click on your profile picture at the top. That will take you to the “Your Info” section. From there, click on the Edit Name link in the lower-right corner.
Now, enter in a new first and last name. Type in the Captcha that’s required and click the Save button. Restart your PC, and you should see the account name change.
Change Account Name on Windows 11 from Control Panel
The classic Control Panel that you’re used to from previous versions of Windows is still in Windows 11. And you can use it to change your account name. To open it, hit the Windows key on your keyboard, type: control panel, select the top result, or hit Enter.
When the Control Panel opens, click on User Accounts.
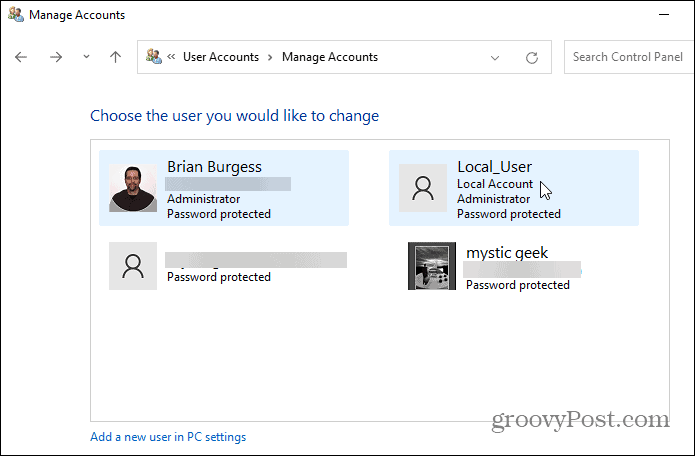
Now, click Manage Another Account and select the account from the list of user accounts you’ve added that you want to edit.
Next, click the “Change the account name” link.
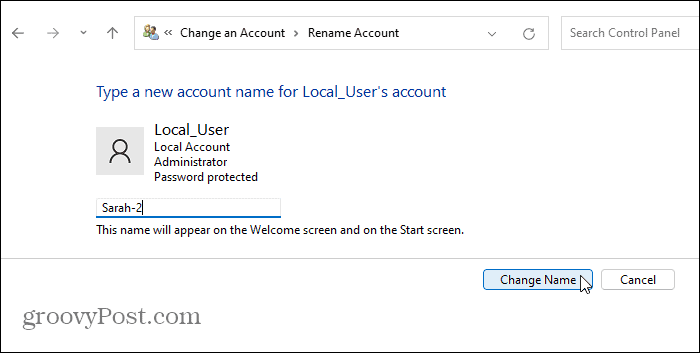
Type in the name you want to use for the account in the “Name” field and click the Change Name button.
Use Advanced Control Panel to Rename User Accounts
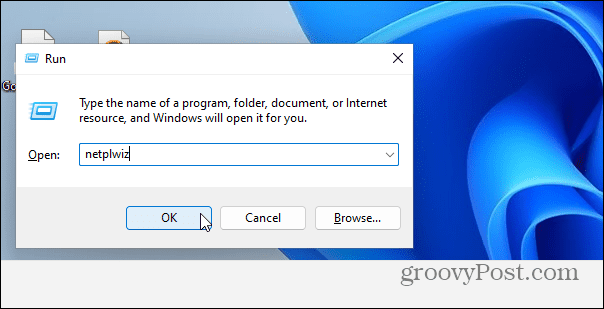
Finally, you can use advanced Control Panel options to rename user accounts. Hit the keyboard shortcut Windows key + R to bring up the Run dialog and type: netplwiz and click OK or hit Enter.
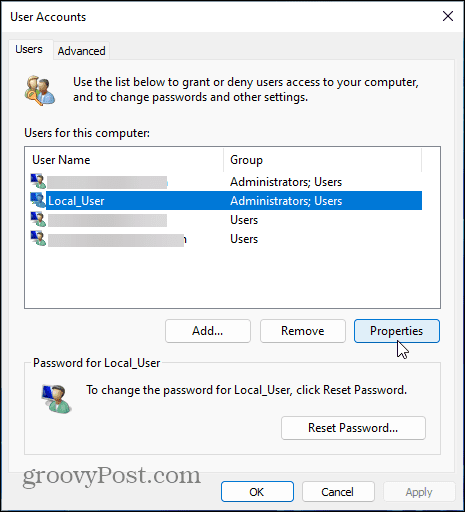
Next, select the account you want to modify and click the Properties button.
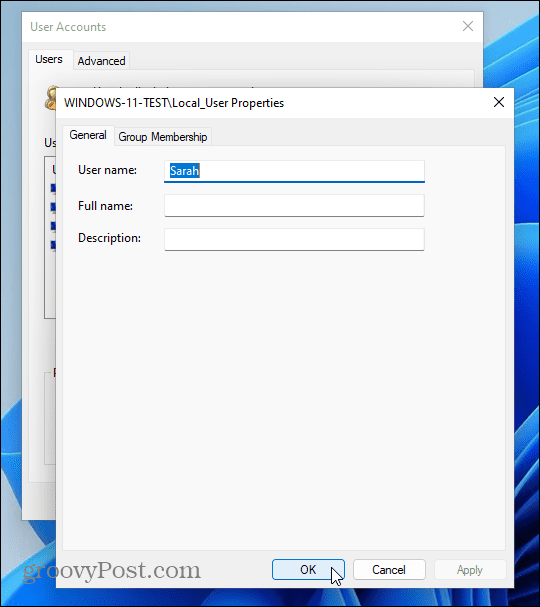
Under the “General” tab, type in what you want the name to be in the “User Name” field. Click Apply then OK twice for the changes to go into effect.
That’s all there is to it. Whichever method you use to change an account name will vary depending on how you want to do it. But you’ll achieve the same results no matter which steps you use. As with all versions of Windows, there’s always more than one way to do a singular task. If you’re not running Windows 11 yet, read our article on changing your account name on Windows 10. And for more on the new OS, take a look at how to rename your Windows 11 PC. If you want to add additional users to your Windows 11 PC, read our article on creating a local user account. Or for more on new features, check out how to use the improved virtual desktops feature. Comment Name * Email *
Δ Save my name and email and send me emails as new comments are made to this post.
![]()
