I press the power button and… nothing. The fans turn on, but the screen remains blank. Even the backlight refuses to turn on. At first, I thought that my display had gone, but even connecting an external one via HDMI didn’t work. To make matters worse, I learned the USB ports weren’t working either. My mouse and keyboard backlight wasn’t coming on. All this meant the worst of the worst—the motherboard was dead and I’d have to wait an eternity to get my laptop repaired. Here I am today, having survived without my own laptop for a whole month, writing this article. I’ve learned a lot of things from this experience so here are my top tips if disaster strikes your PC.
RMA? Read the Fine Print and Keep Your Data
At the time of my motherboard’s death, my gaming laptop was only halfway through its 2-year warranty. I signed up for the RMA service my manufacturer provided and wanted to get it sent in for repairs straight away. But things weren’t so simple. After reading the fine print, I noticed a few things that I wasn’t quite happy with. Although most of my data was backed up to the cloud, there were a few “in progress” projects that I had randomly thrown on the desktop that I’d have hated to lose.
After several frustrating emails and at least 15 calls to the tech support center, I finally managed to get a deal from a third party repair service. What made me most happy is that the contract explicitly stated that “user data will not be altered unless necessary for the repair process.” That’s all I wanted to hear. After another 5 days of trouble with a rather unreliable courier service I finally managed to have my laptop collected and sent off to repairs.
¡Viva la Portable Apps!
So now I was stuck without my own computer. The good news was that as a student I could use the computers at my university to get most of my work done. The bad news was that university computers are beyond restricted. From obvious issues like not being able to install third party software to ridiculous ideas such as disabling the context menu completely, uni computers were far from enjoyable to work with.
But when it comes to PCs, there’s always a workaround. In my case, the savior was portable apps. Although crashy, buggy and sometimes completely unreliable, it’s better with than without them.
Make Your Mobile Devices Do More with the Right Cables
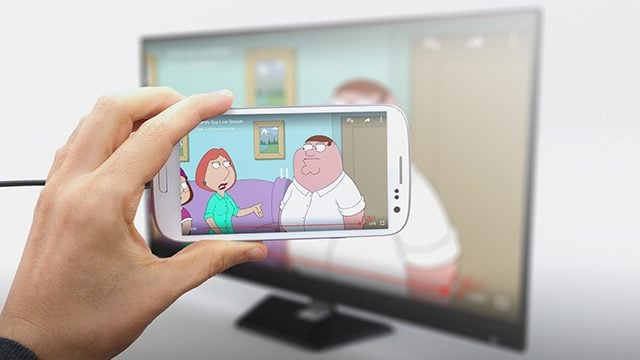
Using university computers for work was a good temporary solution. But what about when I went back home? I was stuck with nothing but a smartphone and an external monitor, sitting there, as if teasing me that it was of no use to me for the time being. But it actually was. A moment of inspiration unraveled as I noticed an Android MHL cable on sale at a local tech store – Bingo!
Entertainment-wise this wasn’t as nice as playing the games on my Steam library. With that said, I could still watch YouTube on a 24″ screen (much better than a 5.5″ one).
Backup: Early, Often, and Everything
As I mentioned earlier, the majority of my important data is backed up to the cloud at all times. Although solutions like Dropbox and OneDrive are fine, it’s Crashplan that makes all the difference in seamlessly keeping an external drive backup as well as a cloud one. The only tip I can give here is to not make the mistake I made – backup everything, including your Desktop. You never know when you’ll need those precious files.
Embrace the Cloud
Even with portable apps I sometimes had a really hard time working on university computers. At times the only location accessible for saving and modifying files was our student server space, which was not only limited to 5GB, but was also very slow to work with. Needless to say, I used my own external hard drive to remedy this issue without hesitation. But when I didn’t have to work with heavy data (raw photos, video, project files) it would have been a pain to carry around a hard drive all the time. So for more basic things like notes and documents, I still relied entirely on the cloud. Services like Google Keep and Office 365 helped me stay on track by keeping all my data in the cloud.
Beat Bloatware by Booting from a USB Stick
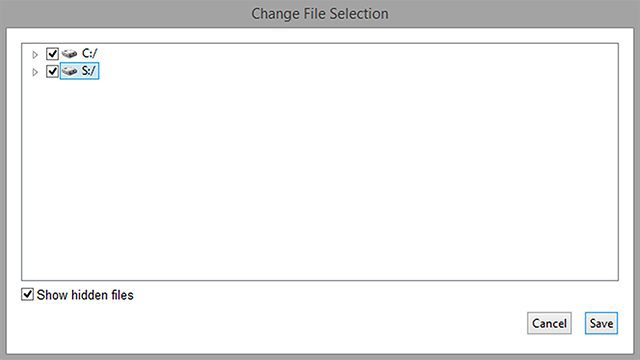
My university offers loanable laptops that you can take home for up to 18 hours. I thought this was a great idea until I realized that the laptops were nearly unusable, bogged down by unneeded antivirus programs, security measures, limitations, and various software that could track whatever you’re doing. I also learned our IT team was very blunt about this. Here’s the message that appears every time before logging in to Windows:
I’m fine with being tracked and spied on. I’m not planning on developing nuclear weapons with iTunes or anything. But when Chrome takes 48 seconds to load that’s when you know the bloatware is too much. So I put a bootable Ubuntu on my USB key and escaped to my own little word.
Was I allowed to do this? I don’t know. But I did it anyway. I didn’t really cause any harm and I was able to browse the web crash-free.
Conclusion
I always like to say I’ve learned a lot more from negative experiences than I have from positive ones. And the same applies here. If you’re ever left without your own PC you will survive. But as I’ve shown in this article your survival won’t be easy. Thinking outside the box is key, and improvising quickly and efficiently is even more important. Have any tips to share? Feel free to drop them in the comments below. Comment Name * Email *
Δ Save my name and email and send me emails as new comments are made to this post.


![]()
